
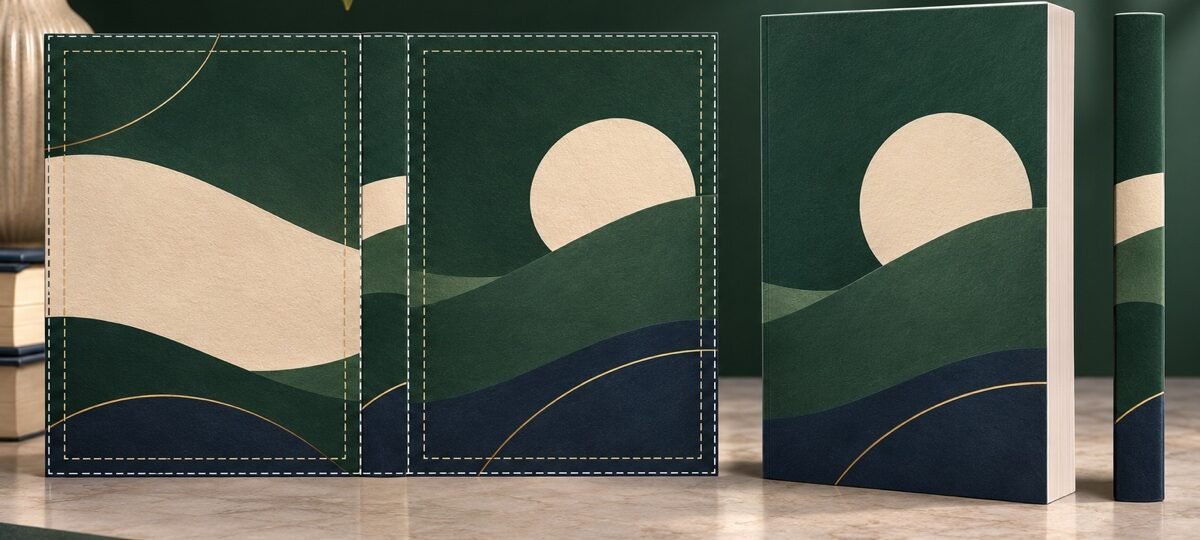
Quick answer
A full-wrap paperback cover is one flat file: back cover, spine and front cover laid side by side, plus 0.125 in of bleed on every outside edge. Build it on your printer’s template for your exact trim, page count and paper, keep the barcode zone clear, and export a single PDF with 300 PPI images.
An ebook cover is one rectangle. A paperback cover is three of them joined: back, spine and front, printed as a single sheet that wraps around the book. We build these wraps every week for authors uploading to KDP and IngramSpark, and the build order below is the one we use. This guide is about the process. The dimension tables themselves live in our book cover size guide, and nothing here replaces them.
The cover shown further down is in stock as of this update and sells once, like every design we list. Designer-Created premades run $49.99 ebook / $99.99 with the print wrap / $149.99 with hardback, and every paperback tier includes a wrap built to your book’s spec.
What a full wrap actually is
Lay a closed paperback face down, open the cover flat, and you are looking at the wrap: back cover on the left, spine in the middle, front cover on the right. That order trips people up constantly. Your front art goes on the right half of the canvas, because the sheet folds around the book from the front.
One worked example runs through this article: a 6 x 9 in novel, 232 pages, cream paper. On KDP that gives a spine of 0.58 in (232 pages x 0.0025 in per cream page ) and a canvas 9.25 in tall once bleed is added . Every number changes when the inputs change, which is where the build starts.
Step 1: lock the four inputs before any art
A wrap is generated from four facts. Until all four are final, you are decorating, not building.
| Input | What it changes |
|---|---|
| Trim size | Width and height of both panels |
| Page count | Spine width |
| Paper stock | Spine width (each stock has its own per-page thickness) |
| Printer | Template, barcode handling, colour expectations |
KDP publishes per-page thicknesses of 0.002252 in for white paper and 0.0025 in for cream on black-ink books , and its cover calculator turns your four inputs into a downloadable template. Use the template every time. If your page count shifts by even ten pages at proofing, the spine math changes and the wrap gets rebuilt. Full spec tables per trim size are in the size guide.
Step 2: set up one canvas, not three
Do not design three separate rectangles and glue them together. Set up one canvas at the full wrap size and keep the template on a layer above the art with its opacity dropped.
The width formula is bleed + back + spine + front + bleed. For the worked example: 0.125 + 6 + 0.58 + 6 + 0.125 = 12.83 in wide, and 9 + 0.125 + 0.125 = 9.25 in tall . Build at 300 DPI at final size from the first layer; upscaling a finished cover later softens every edge. The template’s fold lines are your only reliable map of where the spine actually sits.
Step 3: place the front art and respect the fold
Front art goes on the right panel, sized so the background runs past the trim line to the bleed edge. Keep every letter and any element you care about at least 0.25 in inside the trim . Print folding drifts by a millimetre or two on any run, so art that just touches the spine fold on screen can crease around the corner on paper. Give the fold nothing it can ruin: no type near it, no face sitting on it.
Step 4: what goes on the spine?
On a 0.58 in spine there is room for the title and author surname, usually rotated to read top to bottom. Two rules keep it printable:
- Below a printer-specific page count (KDP’s sits 79-page threshold ) spine text is not allowed at all, because the spine is too narrow to hold it. Short book, blank spine, and the panels do the talking.
- Leave clearance between spine text and both fold lines. Text that fills the spine edge to edge will wrap onto a panel on the first slightly-off fold.
The spine background should continue the panel art across both folds. A hard colour change exactly on a fold line is the most visible misregistration a bookshelf ever shows.
Step 5: build the back panel around the barcode zone
The back carries the blurb, an optional author bio or photo, and the barcode. Reserve the barcode zone first: 2 x 1.2 in in the bottom-right corner of the back panel . KDP prints its own barcode there if your file has none, so anything you place in that corner gets covered. If you bought your own ISBN and barcode, it sits in the same zone; our ISBN guide covers who needs their own and who can use Amazon’s free one.
Keep the blurb short enough to set large. A 150-word blurb at readable size beats a 300-word blurb at 8 pt every time, and the back panel is the one place a browsing reader holds four inches from their face.
Step 6: export one flat PDF and preflight it
Flatten the layers, embed or outline the fonts, and export a single PDF at 300 DPI with no crop marks . Then check five things before upload:
- Background art reaches the bleed edge on all four sides
- Spine text sits centred between the fold lines
- Nothing but background in the barcode zone
- Title and author text at least 0.25 in inside trim
- File built from the template for your final page count, not an earlier draft
KDP’s previewer will catch most geometry errors, but it catches them after upload. This list catches them before.
Which front art survives the wrap?
Some covers extend into a wrap gracefully and some fight it. Art built around a contained focal point on a broad field is the easy case: the field simply continues across the spine and back, and the back panel reads as designed rather than improvised. Full-bleed photographic scenes are the hard case, because the scene ends at the front trim and the back needs a matching treatment built from scratch. Plenty of covers on our fantasy and epic fantasy shelves are built the easy way on purpose.
Scales of Twilight
A wrap-friendly front from our epic fantasy shelf: the art is a self-contained circular dragon emblem on a near-black field, so the background extends across the spine and back panel with no stretching or cloning, and the spine can run the silver serif on solid black. Designer-Created, $49.99 as an ebook cover or $99.99 with the full print wrap built to your spec.

Where a bought cover fits
If you buy instead of build, the wrap should be part of the product, not an afterthought. Every paperback tier we sell ($59.99 AI-assisted and labelled, $99.99 Designer-Created) includes the full wrap built on your printer’s template for your final trim, page count and paper, barcode zone reserved. Books going wide need a second wrap per printer, and custom work runs $120 to $350 when the shelf does not hold your book. Either way, the six steps above are exactly what you are paying someone to get right.
FAQ
— Every paperback tier includes the print wrap built to your printer’s template, from $59.99. 1,500+ designs in stock, each sold once. Start at the fantasy shelf or brief a custom wrap.
A full wrap is the complete printed cover of a paperback as one flat file: back cover, spine and front cover side by side, extended by a bleed margin on the outside edges. Print-on-demand services like KDP and IngramSpark require the wrap as a single PDF built to your book’s exact trim, page count and paper.
Spine width is page count multiplied by your paper’s per-page thickness. On KDP, black-ink books run 0.002252 in per page on white paper and 0.0025 in on cream, so a 232-page cream book gets a 0.58 in spine. Use the printer’s calculator rather than doing the math by hand.
Yes. Reserve a barcode margin shown on KDP’s generated template in the lower-right corner of the back panel. KDP prints its own barcode there when your file does not include one, covering whatever sits in that corner. If you bought your own ISBN, your barcode occupies the same zone.
The front art can carry over, but the file cannot. A paperback needs the full wrap: back panel, spine sized to your page count, bleed on the outside edges and a clear barcode zone. That is why our paperback tiers deliver a built wrap rather than the ebook rectangle resized.